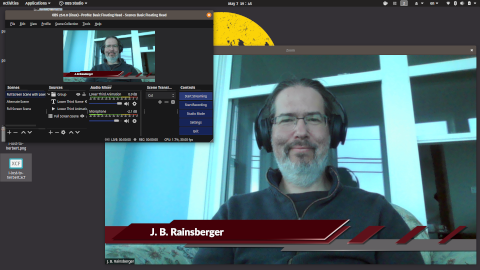
Broadcast from OBS Studio To Everything In Linux
Summary
OBS Studio 26.1 made this article mostly obsolete. If you’re stuck on an earlier version of OBS Studio, then you’ll need some help to enable a “virtual camera” for fancy backgrounds and other interesting uses.
Bad News, Everyone!
As of 2021-07-02, upgrading to Ubuntu (or Pop!_OS) 21.04 creates a problem with the Virtual Camera feature of OBS Studio. Fortunately, there is a workaround that’s only very mildly annoying.
I’m experiencing the problem in this issue: https://github.com/obsproject/obs-studio/issues/4808.
I work around the problem by doing the following:
- Exit OBS Studio.
$ sudo modprobe -r v4l2loopback- Launch OBS Studio.
- Press Start Virtual Camera.
If I stop the Virtual Camera, then I need to repeat these steps in order to restart it. Not so bad. I wish the OBS Studio team well in fixing the problem; I wish I knew enough to be able to help.
Good News, Everyone!
OBS Studio 26.1 now bundles “virtual camera” behavior out of the box, making this article essentially obsolete. If you’re on Linux and you’d like to broadcast from an OBS Studio scene, such as to Zoom, it now suffices to do two simple things:
- Install the package
v4l2loopback-dkms. - Open OBS Studio and press the “Start Virtual Camera” button.
That’s it.
Migrating From This Custom Solution
If you’ve previously followed these instructions, or something like them, then I recommend doing the following before following the instructions above:
- Delete
/etc/modules-load.d/v4l2loopback.conf, so that the packagev4l2loopback-dkmscan install whatever it needs to. - Delete
/etc/modprobe.d/v4l2-obs-studio.conf, because OBS Studio will take care of this. - Commit. (You’re using
etckeeper, right?) - Reboot.
After rebooting, you’ll notice that when you press “Start Virtual Camera” the first time, you’ll need to enter your administrative password. At that point, you’re doing sudo modprobe v4l2loopback.
You’ll also notice that the virtual camera device is now called “OBS Virtual Camera”, in case the difference in name causes a problem for you. Good luck.
For OBS Studio 26.0 and Earlier…
I wanted a slicker-looking live video presence than what I could achieve with Zoom1 and its wonderful virtual background feature. Some time ago I learned about OBS Studio, but it presents a steep learning curve and it took me quite some time to find the energy to sit down and start climbing that curve. When I finally did so, I learned about a simple idea: you can create a virtual camera device the captures the output from OBS Studio, then makes that available to other applications as just another video source. This means that I could create cool scenes and transitions in OBS Studio, then use them in a live video, such as a conference talk or real-time video training session. That sounded great to me! When I tried to learn how to do it, unfortunately, it seemed I needed Windows or Mac OS to do it… and I have been running Pop!_OS Linux since the summer of 2018.
I Found It!
I spent an hour watching tutorial videos on YouTube about getting OBS Studio up and running on Linux. I had previously installed it and played around with it, but I hadn’t learned much about how really to use it, so I finally took the time to do that today. In the process, I stumbled upon a Linux plugin to enable the virtual camera device in OBS Studio. I tried it and it worked! I found it relatively painless to build and install and get working. Since I had to cobble a couple of things together to make it room and I needed to tweak something slightly, I thought I’d do my duty as a FOSS citizen and put the instructions together here, hoping that the next person who needs it can find it all in one place. Enjoy!
Overview
I found, built, and installed the following:
- A video loopback device, which creates the virtual camera device that Linux can present to applications as just another video source.
- A video sink plugin for OBS Studio, which connects the output from OBS Studio to the video loopback device.
I think of these two things as acting like an HDMI cable from OBS Studio to the Linux video subsystem: it allows you to capture output from OBS Studio in exactly the same way as you’d capture video from an internal webcam or an external camera connected by an HDMI/USB adapter.
I found projects on Github for each of these two pieces of software, installed them, and they just worked! The whole thing took about 15 minutes.
Details
My Original Environment
- Pop!_OS 19.10, which is pretty close to Ubuntu 19.10.
- OBS Studio 25.0.8.
It Still Runs On
- Pop!_OS 20.04 with OBS Studio 26.0.2.
- Pop!_OS 20.10 with OBS Studio 26.0.2.
Video Loopback Device
I followed the instructions at https://github.com/umlaeute/v4l2loopback to install the video loopback device. I found these instructions easy to follow, but I didn’t like that the resulting virtual camera device appeared in Linux as “Dummy output device (0x0000)”, so I’ve added here the instructions to giving your virtual camera device a user-friendly name.
I installed a kernel module, then configured it. If this sounds frightening to you, don’t panic.
Install the Kernel Module
Before I started, I listed my video devices, so that I could more-easily detect whether something changed after building this project.
$ ls -al /dev | rg -i video    # I use ripgrep; you can use grep instead
crw-rw----   1 root    video      29,   0 Apr 28 12:01 fb0
crw-rw----   1 root    video     239,   0 Apr 28 12:01 media0
crw-rw----+  1 root    video      81,   0 Apr 28 12:01 video0
crw-rw----+  1 root    video      81,   1 Apr 28 12:01 video1
Next, I installed a package that contains the kernel module.
$ sudo apt-get install v4l2loopback-dkmsNext, I verified that the kernel module is installed.
# for me, right now, KERNEL_VERSION is 5.8.0-7630-generic
$ ls -al /lib/modules/$KERNEL_VERSION/extra
[...]
-rw-r--r-- 1 root root 70728 Dec  5 17:36 v4l2loopback.ko
[...]
Next, I loaded the new kernel module and configured it with a nicer name.
# Load modules that v4l2loopback might need
$ sudo depmod -a

# You can choose any name you like for the card_label argument below
$ sudo modprobe v4l2loopback card_label="Virtual Cam" exclusive_caps=1
The parameter exclusive_caps matters for reasons I don’t quite understand. If you know why it matters, then I invite you to explain that in the comments. I’d like to learn, but I don’t want to read through pages of documentation to try to find it.
After this, I checked that I had a new virtual camera device.
$ ls -al /dev | rg -i video
[...]
crw-rw----+  1 root    video      81,   2 May  7 19:22 video2
Hey, I saw a new video device at /dev/video2! Good. I used that device pathname to tell the OBS Studio plugin where to broadcast its video.
I opened Zoom, found the setting for which video source to use, then chose “Virtual Cam”. The option existed, which showed me that I had created a virtual camera device, but it showed nothing, because nothing was sending video to it.
Fallback: Build the Kernel Module
If you can’t install the kernel module through a package, then you can fall back on these instructions. I did this before I discovered that I could simply install a package.
# I choose to put third-party projects here
$ cd $HOME/ThirdParty
# Note: if you choose someone else's fork, then clone that repository instead!
$ git clone https://github.com/umlaeute/v4l2loopback.git
# The directory that git creates
$ cd v4l2loopback
$ make
# Installs new kernel module called v4l2loopback
$ sudo make install
# for me, right now, KERNEL_VERSION is 5.8.0-7630-generic
$ ls -al /lib/modules/$KERNEL_VERSION/extra
[...]
-rw-r--r-- 1 root root 70728 Dec  5 17:36 v4l2loopback.ko
[...]
From here, I loaded and configured the kernel module as described above.
OBS Studio Video Sink
I followed the instructions at https://github.com/CatxFish/obs-v4l2sink. To build this plugin, I need to have the libraries from OBS Studio itself, which adds a step. I also need the QT Base 5 development libraries, which adds another step.
# I choose to put third-party projects here
$ cd $HOME/ThirdParty
# Install QT 5 development libraries
$ sudo apt install qtbase5-dev
# I need the OBS Studio libraries
$ git clone --recursive https://github.com/obsproject/obs-studio.git
# Choose the desired fork!
$ git clone https://github.com/AndyHee/obs-v4l2sink.git
$ cd obs-v4l2sink
$ mkdir build && cd build
# In my case, OBS_STUDIO_PROJECT_ROOT=$HOME/ThirdParty/obs-studio
# In my case, OBS_V4L2SINK_PROJECT_ROOT=$HOME/ThirdParty/obs-v4l2sink
$ cmake -DLIBOBS_INCLUDE_DIR="$OBS_STUDIO_PROJECT_ROOT/libobs" -DCMAKE_INSTALL_PREFIX=/usr $OBS_V4L2SINK_PROJECT_ROOT
$ make -j4
$ sudo make install
Next, I opened OBS Studio to tell it which video device to send its output to.
- Choose Tools > V4L2 Video Output.
- Enter the device pathname for “Path to V4L2 Device”. In my case, this is
/dev/video2. - Press Start.
Now OBS Studio is sending a video signal to the virtual camera device!
I opened Zoom, started a meeting, selected the Virtual Cam video source, and it just worked!
Cleaning Up Before Moving On
Enable the Virtual Camera After Rebooting
I load the kernel module at boot time by creating two files and giving them root ownership.
First, I create the file /etc/modules-load.d/v4l2loopback.conf with the following content:
v4l2loopbackI confirm that it’s there and has the needed ownership and permissions.
$ ls -al /etc/modules-load.d
total 24
drwxr-xr-x   2 root root  4096 Sep  2 10:57 .
drwxr-xr-x 207 root root 12288 Oct 19 11:44 ..
[...other modules...]
-rw-r--r--   1 root root    13 Jun  3 17:01 v4l2loopback.conf
Second, I create the file /etc/modprobe.d/v4l2-obs-studio.conf with the following content:
options v4l2loopback card_label="Virtual Cam" video_nr=2 exclusive_caps=1This creates the new video output device as /dev/video2, just as I did before. You might need to choose a different value for video_nr.
I confirm that it’s there and has the needed ownership and permissions.
$ ls -al /etc/modprobe.d
total 72
drwxr-xr-x   2 root root  4096 Oct  5 09:41 .
drwxr-xr-x 207 root root 12288 Oct 19 11:44 ..
[...other module configurations...]
-rw-r--r--   1 root root    74 Sep 28 12:43 v4l2-obs-studio.conf
After rebooting, I can see that the video device /dev/video2 already exists, without running modprobe myself as I did previously.
Automatically Start the Virtual Camera Output From OBS Studio
The OBS Studio plugin has an option to start the video sink automatically, which I have enabled. This means that after I start OBS Studio, my Virtual Camera device is running and I can use it.
Special Steps For Some Tools
Some broadcast tools just work with the Virtual Camera device and some require a little dance to work. As of October 2020, I still needed these steps in order to use my Virtual Camera with BlueJeans Events and Video Facilitator (on Chrome), although I didn’t need them for Zoom nor Google Hangouts.
From https://github.com/jitsi/jitsi-meet/issues/5186#issuecomment-605506403:
- Close every application that might be trying to use the webcam. Verify that the physical webcam is not running. (In my case, the light is off.)
- Open the web browser/meeting app and start a video conference using the physical webcam. The Virtual Camera will not be available yet.
- Open OBS Studio, activating the video sink plugin. You’ll see your scene without the signal from your physical webcam. Don’t worry yet.
- Return to the video conference and change the settings to use the Virtual Camera instead of the physical webcam.
- Return to OBS Studio, then edit the camera in your scene to re-select the physical webcam device. At this point, OBS Studio “steals back” the physical webcam and your scene will look the way you expected.
This seems to be an issue with some specific technology sitting inside the video conferencing system, which affects the order of these steps.
That’s it! Enjoy.
Please Note! No Support
I wrote this article to provide additional support for people trying to use these tools. I’m happy to try to answer questions and to improve these instructions, but I cannot offer technical support for building the software packages involved. If you can’t build something, then please go back to the project’s github page and ask for help there. If you ask me here, then I will only slow you down.
Reference
DistroTube, “Open Broadcaster Software (OBS) In Linux”. The tutorial I found most helpful (so far) and in whose comments I stumbled upon the virtual camera device plugin for OBS Studio on Linux./
Yes, I’m aware of the various security/privacy problems with Zoom. I don’t know how to solve that problem and I don’t have a good alternative on Linux. If you want to suggest one, I’m happy to hear about it!↩︎


I can help you profit from your software projects sooner. Or, I can help increase your chances of surviving them. I live where programming meets the business.